Apache Ranger is an application that enables data architects to implement security policies on a big data ecosystem. The goal of this project is to provide a unified way for all Hadoop applications to adhere to the security guidelines that are defined.
Here are some of the features of Apache Ranger:
- Centralized administration
- Fine grained authorization
- Standardized authorization
- Multiple authorization methods
- Centralized auditing
Enable Ranger HDFS plugin
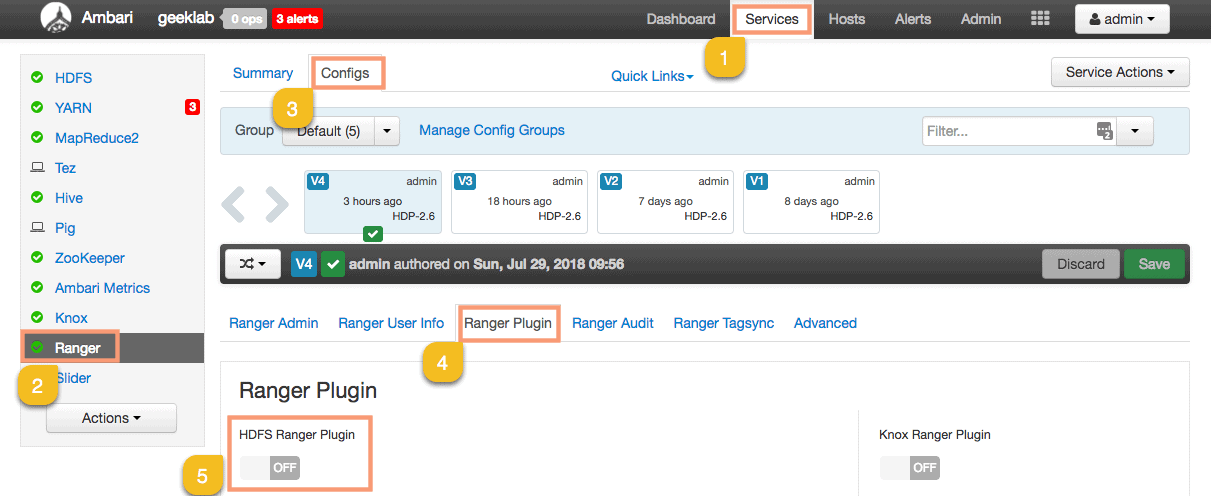
1. To enable Ranger Hive Plugin goto Services > Ranger > Configs > Ranger Plugin. Enable the Ranger HDFS Plugin on this page.
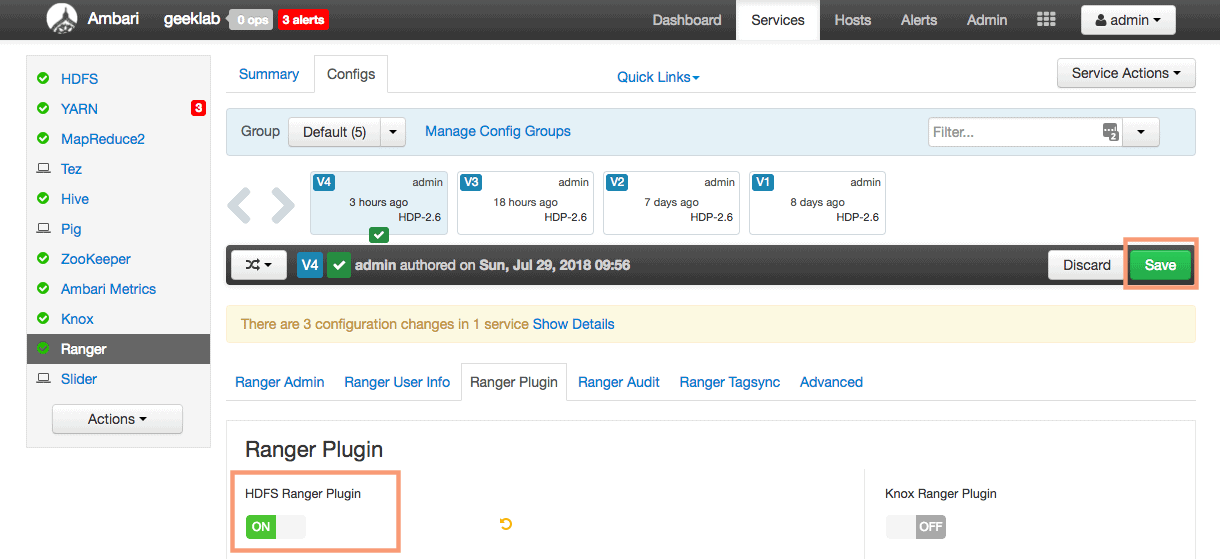
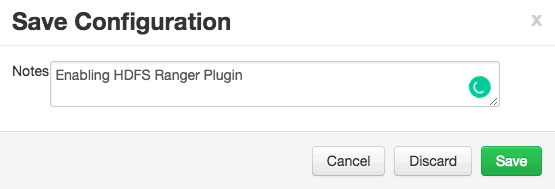
2. Save the config by providing an appropriate description note.
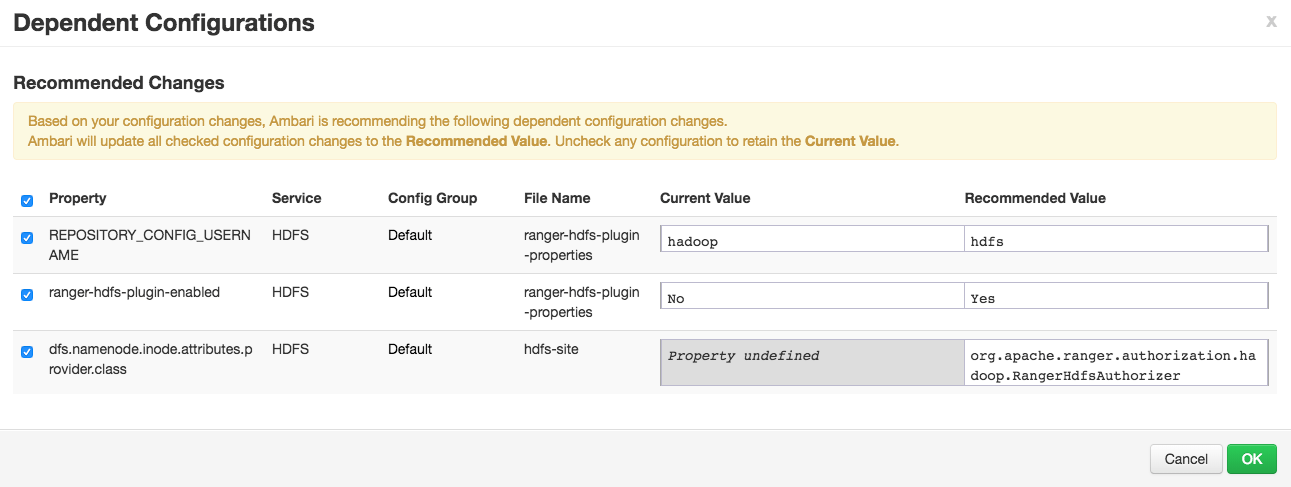
3. Ambari will prompt for some recommended changes to be done in order to enable the Ranger HDFS Plugin. Accept the changes and proceed.
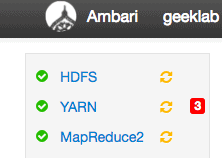
4. We need to restart the few Services like HDFS, YARN for the changes to take effect.
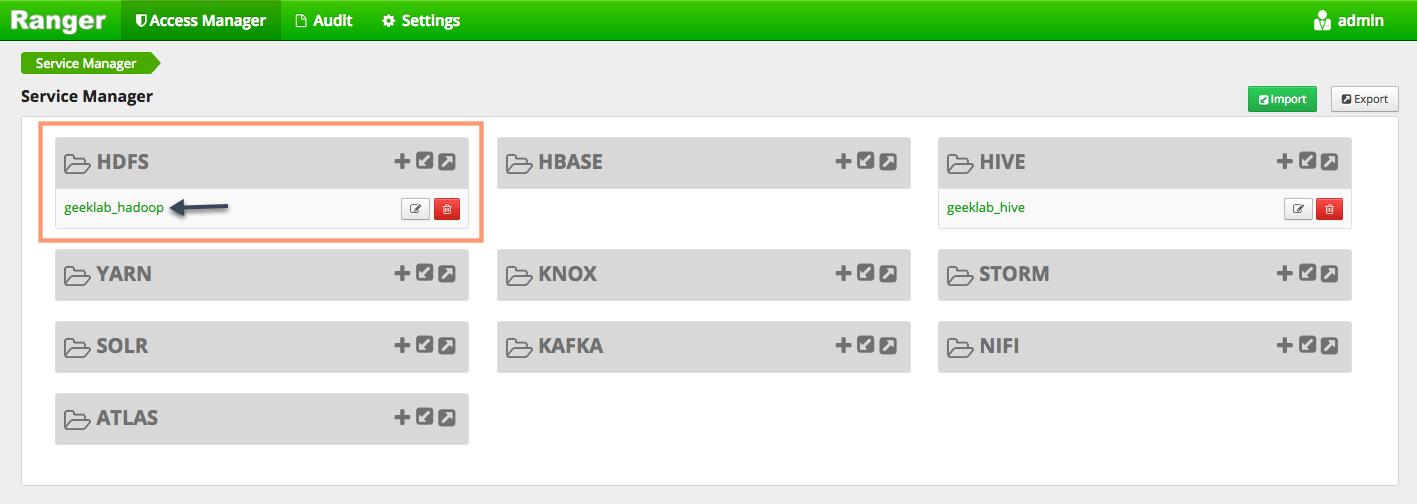
Overview of Ranger Admin UI and pre-configured policies for HDFS
You can log in to the Ranger Admin UI and check if the Ranger HDFS Plugin is enabled and you can create policies for HDFS users. To login to the Ranger Dashboard use the default username/password of admin/admin.
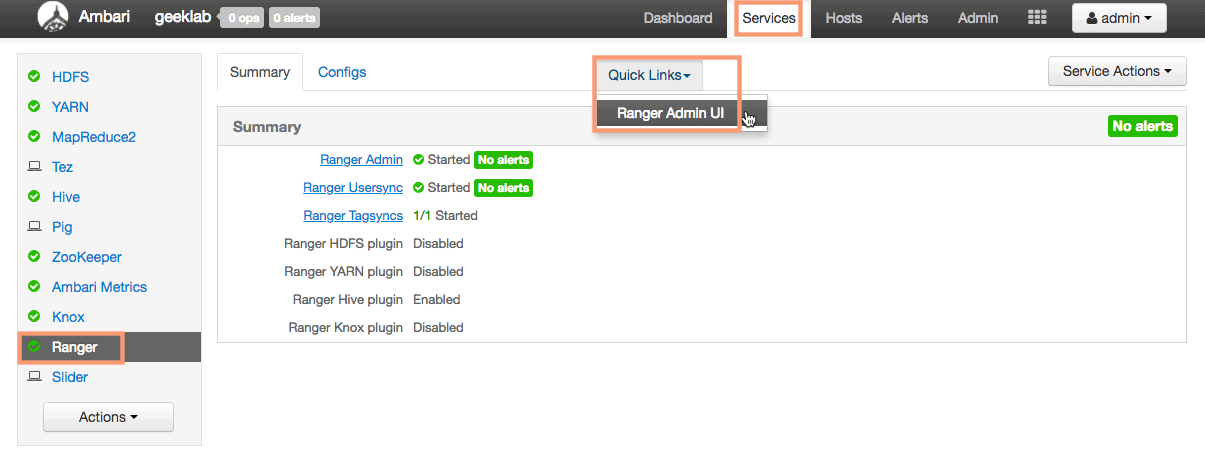
You can also goto the Ranger Admin UI with below URL:
http://rangerserver:6080
When you log in to the Ranger UI, the home page lists the various menus and types of policies that can be created using Ranger. As we can see the Ranger HDFS Plugin is enabled and we can view the pre-configured policies for HDFS.
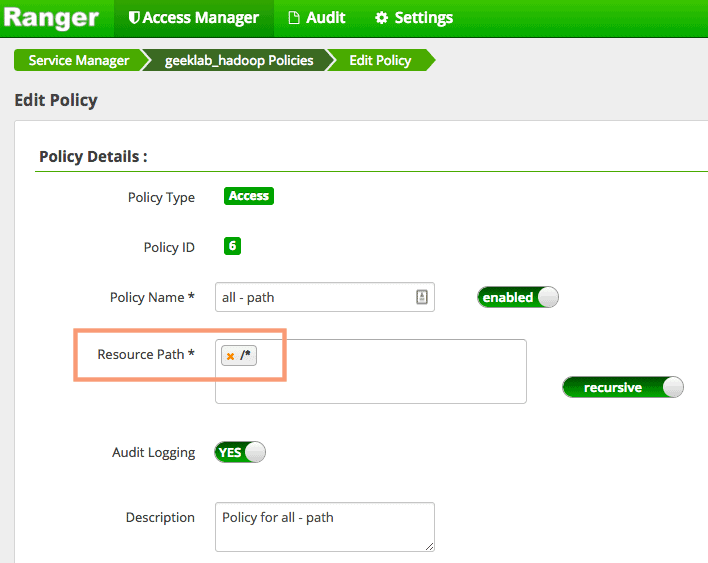
You can edit the pre-configured policies as shown below.

This particular policy provides ALL permissions (read, write, execute) to user “hdfs” and “ambari-qa” on all the filesystems under root ( /* ). You can add a new user/group and also modify the permissions on this page.

Creating a new Ranger HDFS Policy
Let’s create a new Ranger HDFS Policy to allow access to a particular mount point (/user/test) to the user “sandeep”. The user will have all the permissions (rwx) on the mount point.
1. Click on the policy group name under HDFS.

2. Now click on Add New Policy to open a new page, similar to the one shown below:
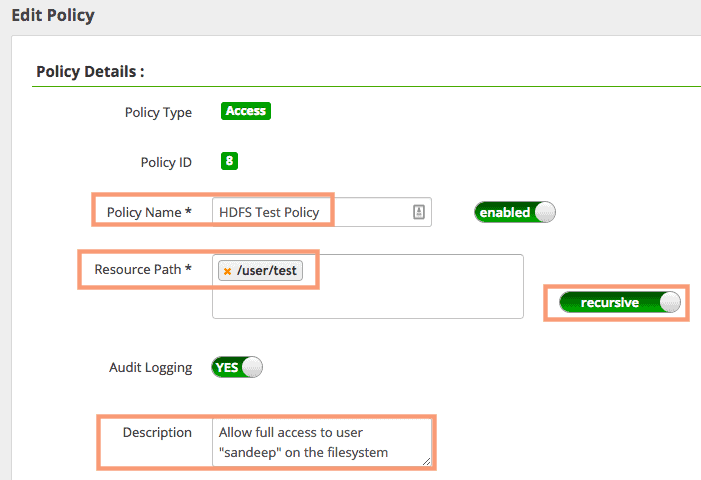
Provide the Policy Name, Resource Path (/user/test) and suitable description for the policy. We would also enable the recursive permission on the filesystem.
3. In the “Allow Conditions” section, we will assign all the permission (read, write and execute) to the user “sandeep” and save the policy.

Verify the Ranger HDFS Policy
Let’s test the policy we have created. Before creating the policy I have already tried creating a directory in the /user/test directory with user “sandeep”. It failed by giving a permission denied error as shown below.
Before creating of HDFS Ranger Policy
Now, after the creation of the policy, if I try to create the directory again, it went successfully. This verifies the functionality of the policy we just created.

After creating HDFS Ranger Policy
How to Configure Hive Authorization Using Apache Ranger