Hive first started with HiveServer1. However, this version of the Hive server was not very stable. It sometimes suspended or blocked clients’ connection quietly. Since version 11, Hive includes a new Hive server called HiveSever2 as an addition to HiveServer1. HiveServer2 is an enhanced Hive server designed for multiclient concurrency and improved authentication. HiveServer2 also supports Beeline as the alternative command-line interface. HiveServer1 is deprecated and removed from Hive since version 1.0.0.
In the last post, we have seen how to install and configure a Standalone HiveServer Service using Ambari. In this post, we will see how to configure the High Availability for HiveServer (HiveServer2).
Configuring HiveServer2 HA
1. To configure HiveServer2 HA, goto Services > Hive and click “Add HiveServer2” under Service Actions.
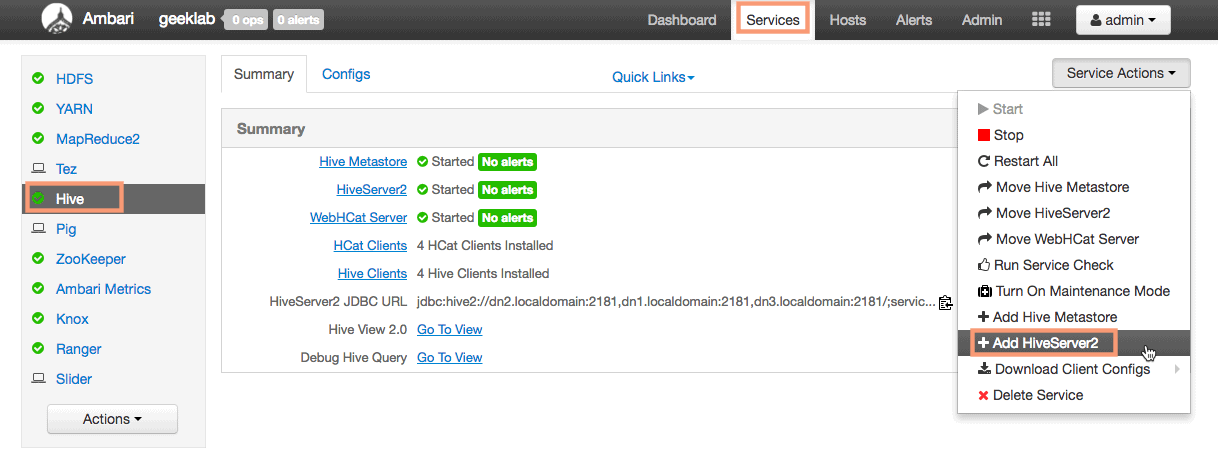
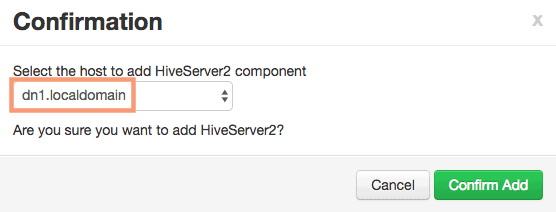
2. Confirm the host to add the HiveServer2 Component and click “Confirm Add”.
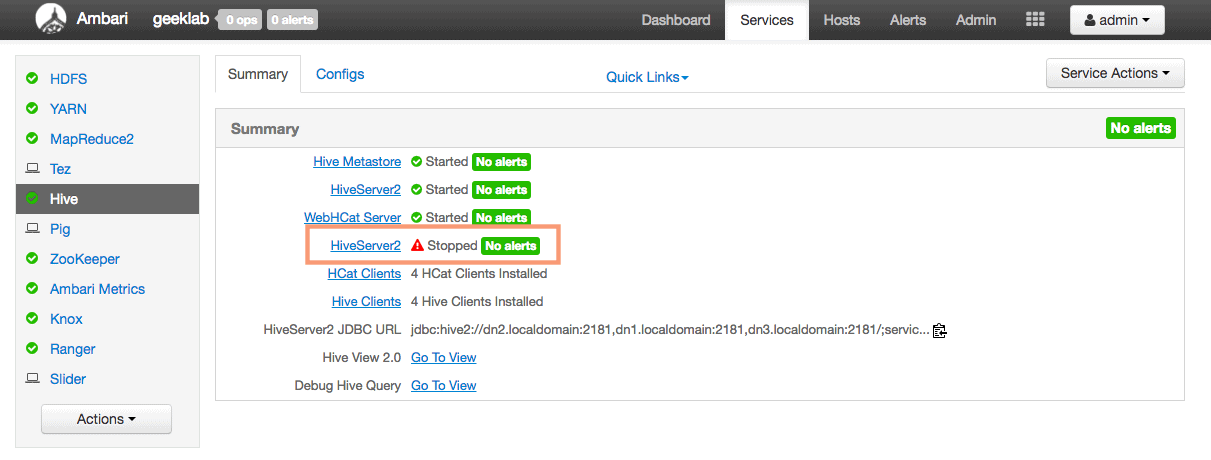
3. Once installed, HiveServer2 needs to be started manually. Go to the Hive Service page and click on the Stopped HiveServer2 host.
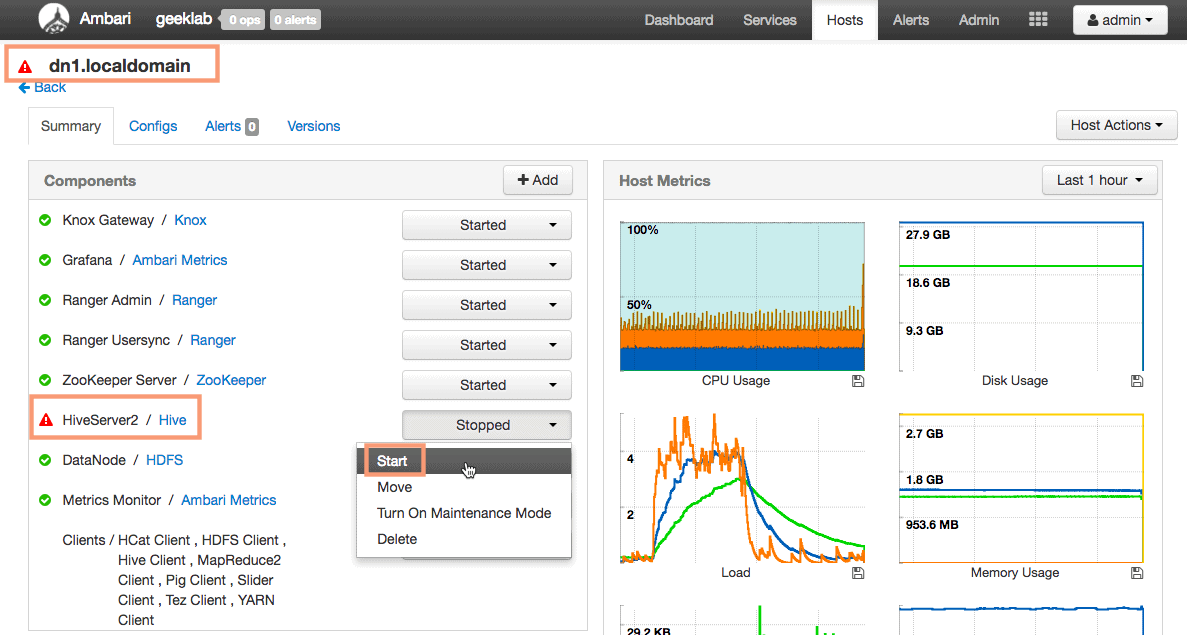
4. Start the HiveServer2 from the drop-down menu.
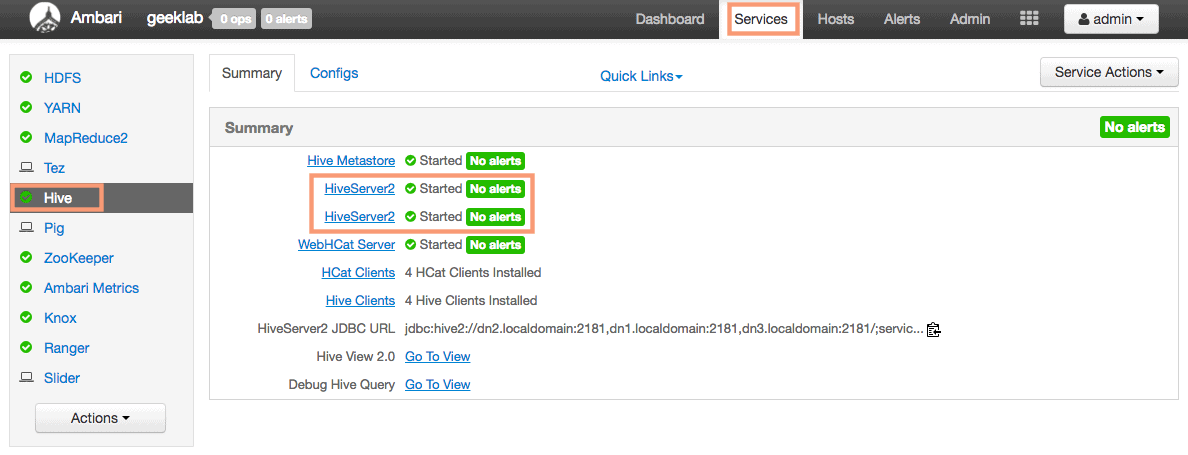
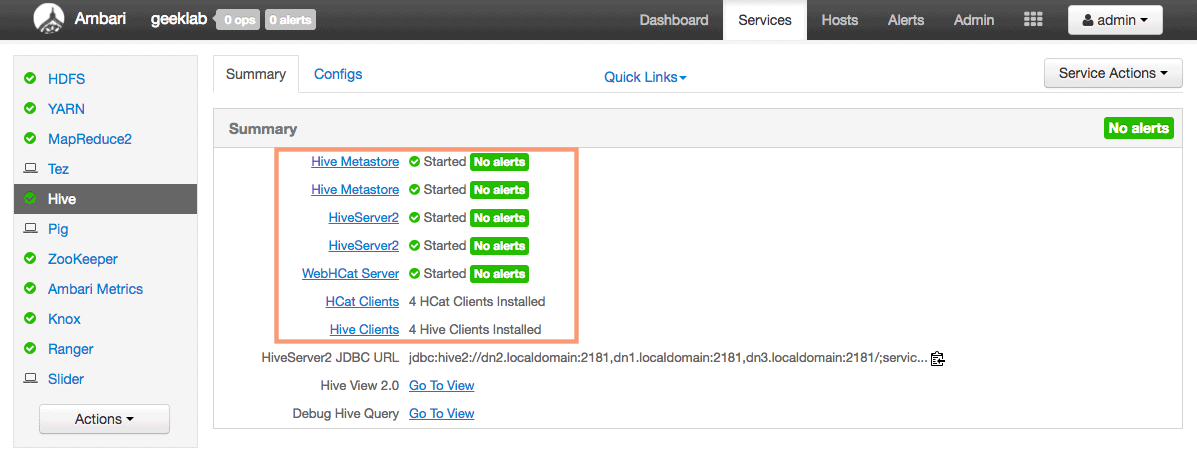
5. Once started you can verify the same in the Hive Service page.
Configuring Hive Metastore HA
Along with HiveServer2 HA, we can also configure the High availability for Hive Metastore. Follow the steps outlined below to configure Hive Metastore HA.
1. Goto the Services > Hive page and click “Add Hive Metastore” under “Service Actions” drop-down.
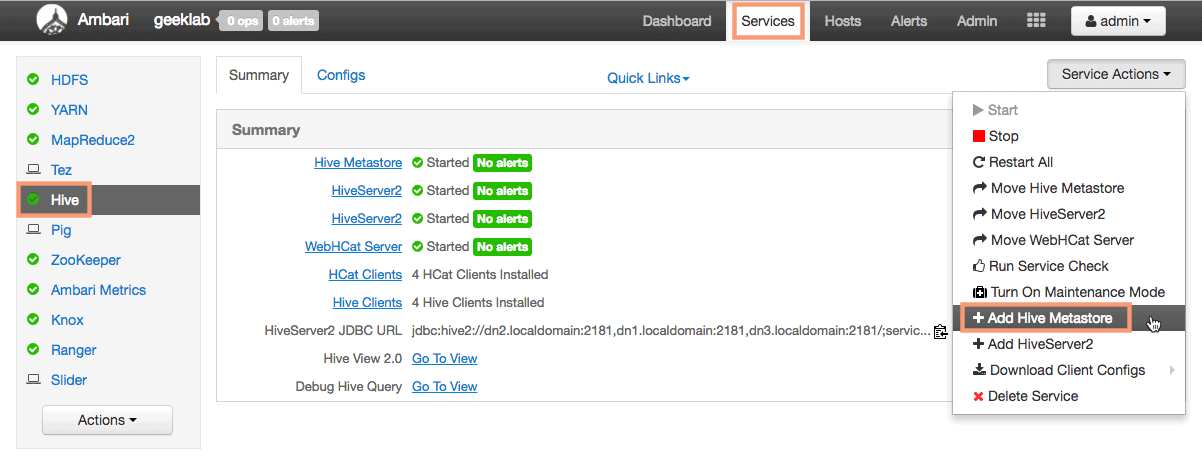
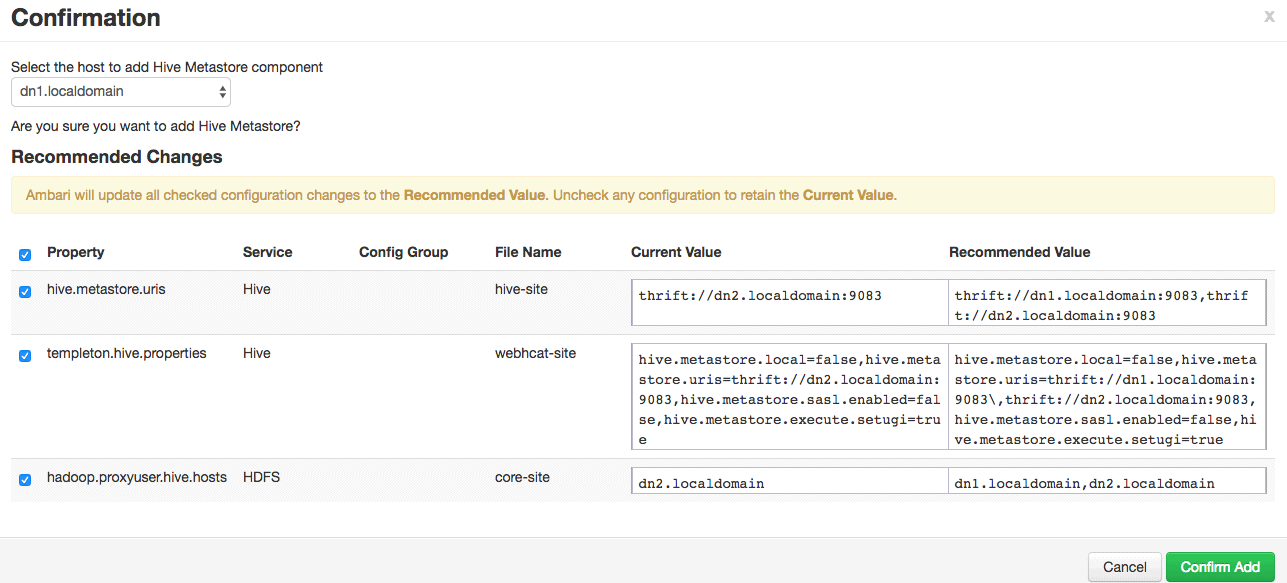
2. The wizard will ask to select the host to add Hive Metastore component. It will also provide some recommended property changes to be done in order to add the new component.
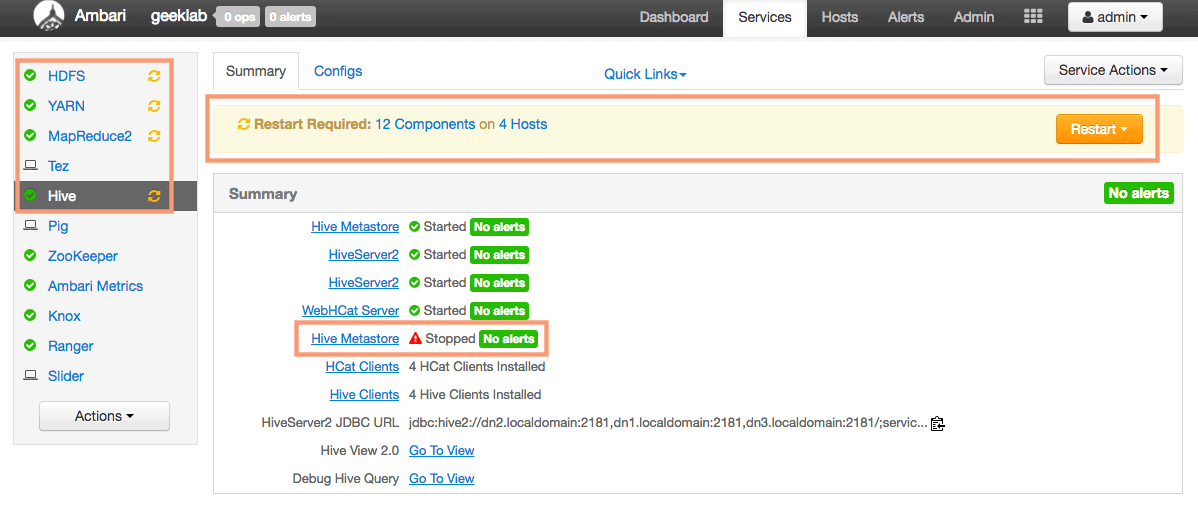
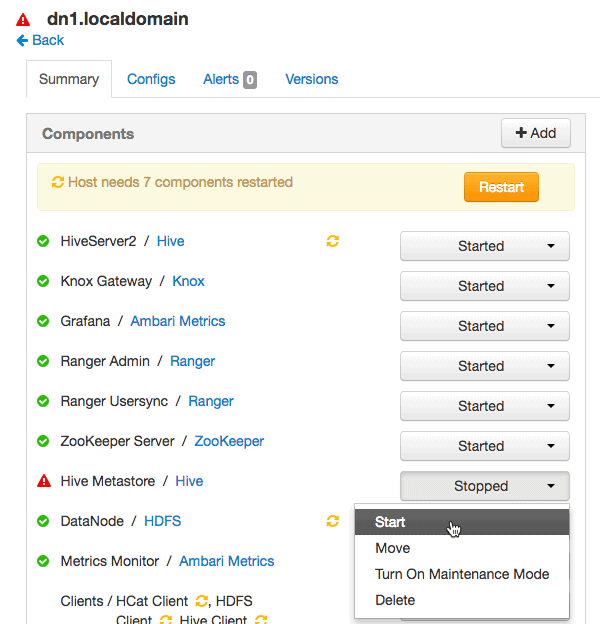
3. Post installation, we need to start the Hive Metastore manually. Along with this, we need to restart few services like HDFS, YARN, Hive etc to complete the Hive Metastore addition. Click the Stopped Hive Metastore to go to the Hive Metastore host page.
4. On the host page, start the Hive Metastore manually as shown below.
5. Verify all the service along with Hive Components.
Connecting the Hive database
Let’s connect to the Hive databases and perform some queries. In order to connect the Hive Database, we need to have the HiveServer2 JDBC URL. It can be obtained from the ambari as shown below. Goto the Hive Service Page and copy the JDBC URL from the page.
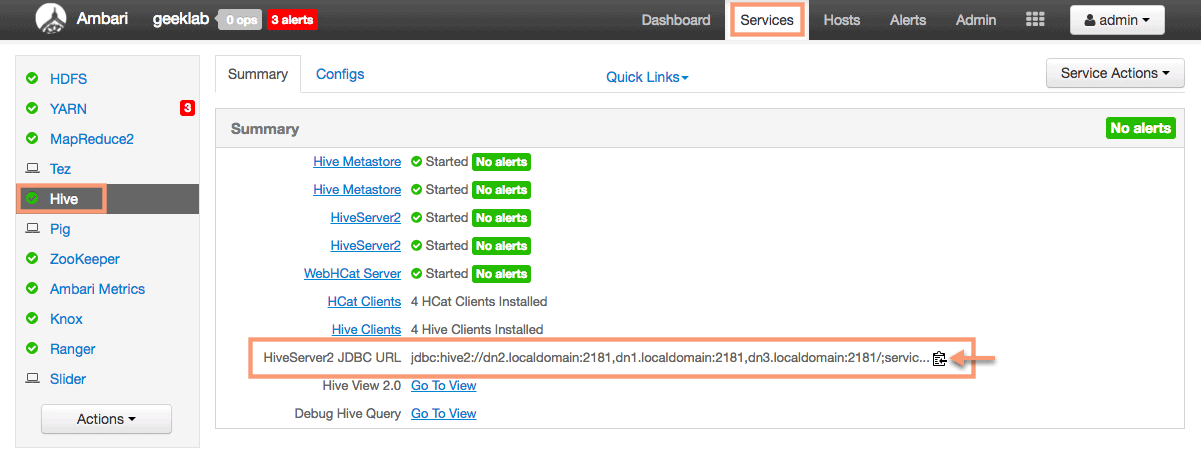
We can connect to the Hive database using “hive” user as it has all privileges on all database objects by default. To connect to the Hive database we need to use the command “beeline“.
# beeline
Beeline version 1.2.1000.2.6.5.0-292 by Apache Hive
beeline> !connect [HiveServer2 JDBC URL]

The username password used to connect hive database is “hive/hive”. The Hive queries works almost like mysql queries. To list available databases in hive, use the query:
0: jdbc:hive2://dn2.localdomain:2181,dn1.loca> show databases;
+----------------+--+
| database_name  |
+----------------+--+
| default        |
+----------------+--+
1 row selected (1.14 seconds)
Similar to MySQL, to create any object or query any object under the database, we need to first use the “use [database]” query.
0: jdbc:hive2://dn2.localdomain:2181,dn1.loca> use default;
No rows affected (0.551 seconds)
To list all the tables under the database “default”, use the below query:
0: jdbc:hive2://dn2.localdomain:2181,dn1.loca> show tables;
+-------------+--+
|  tab_name   |
+-------------+--+
| test_table  |
+-------------+--+
1 row selected (0.561 seconds)
How to Configure Hive Authorization Using Apache Ranger