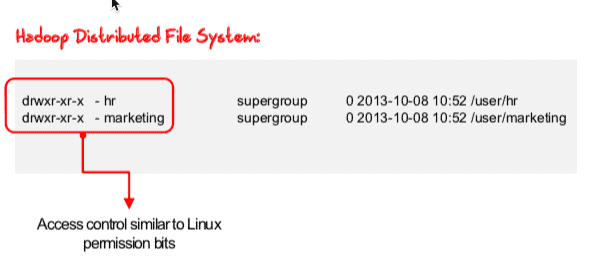
The basis for Hadoop Access Control Lists is POSIX ACLs, available on the Linux filesystem. These ACLs allow you to link a set of permissions to a file or directory that is not limited to just one user and a group who owns the file. The HDFS ACLs give you a fine-grained file permissions model that is suitable for a large enterprise where the data stored on the Hadoop cluster should be accessible to some groups and inaccessible to many others.

To get more info on ACLs you can refer below post.
UNIX/Linux : Access control lists (ACLs) basics
Pre-requisites
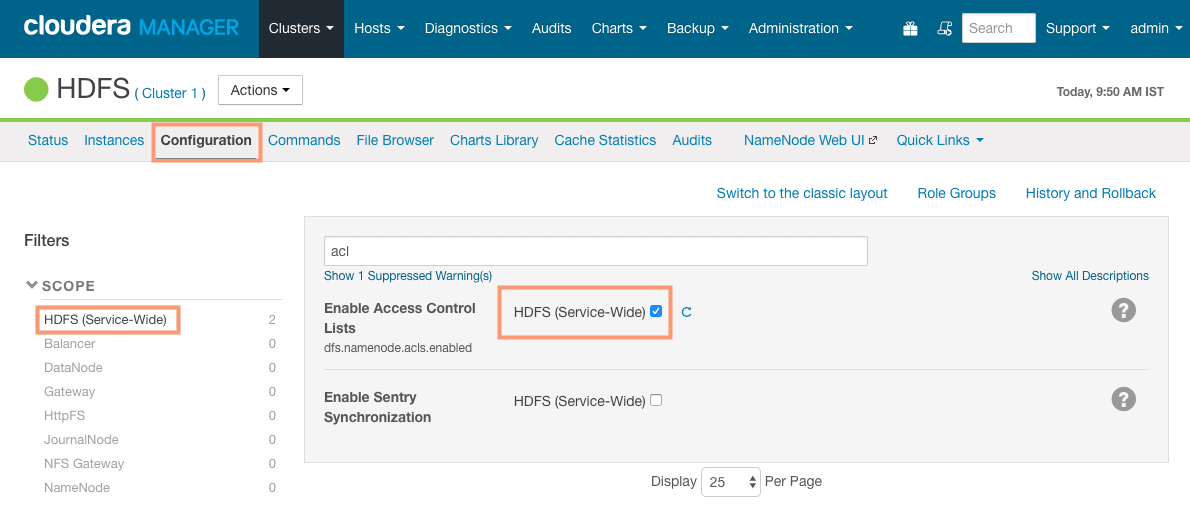
The configuration setting for ACLs is stored in the file /etc/hadoop/conf/hdfs-site.xml in the property named dfs.namenode.acls.enabled. This property is disabled by default. To start using the ACLs, first we enable the ACLs by setting the value of this property to true in the configuration.

Lets enable it using the Cloudera Manager. Goto HDFS > Configuration and search for ACL and check mark the property “Enable Access Control Lists“.

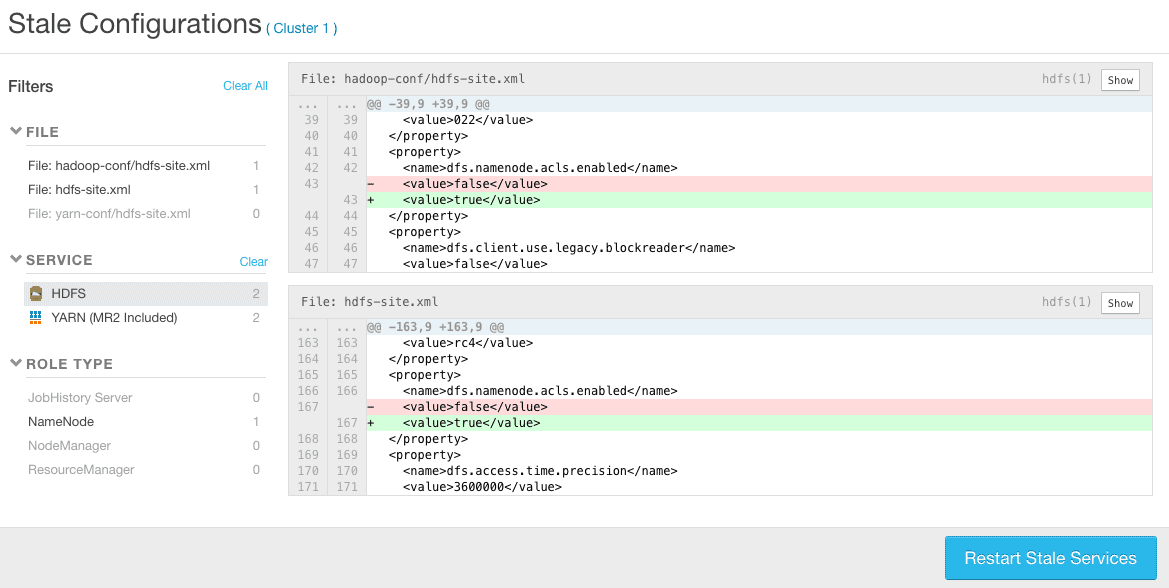
Save the changes and redeploy the stale configuration.

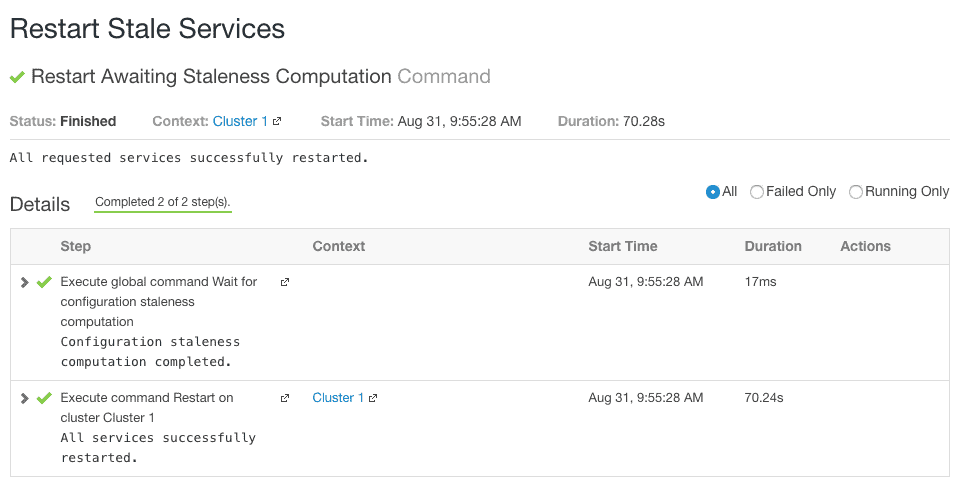
Cloudera Manager would show the changes in the configuration to be deployed. Click “Restart Stale Services” and proceed.


HDFS ACL commandline options
The sytax to set ACLs on a file or directory is as follows:
$ hadoop dfs [generic options] -setfacl [-R] [{-b|-k} {-m|-x [acl_spec]} [path]|[--set [acl_spec] [path]
Below is the list of options which can be used with the command “hdfs dfs -setfacl”:
| Option | Remark |
|---|---|
| -R | Recursively set ACL permissions for the underlying files and directories |
| -b | Revoke all the permissions except the base ACL for user, group and others |
| -k | Remove the ddefault ACL |
| -m | Add new permission to the ACL |
| -x | Remove only the ACL specified |
| [acl_spec] | Comma-separated list of ACL permissions. |
| –set | This optiosn completely replaces the existing ACL. Previous ACL entries will no longer apply. |
The syntax to get the information about ACLs on a file or directory is as follows.
$ hadoop dfs [generic options] -getfacl [-R] [path]
There are not much options to explain here. The -R option can be used to recursively display ACLs on underlying files and directories.
Setting ACLs (Example)
Let’s understand the use of ACL with an example. We will assign a read, write and execute permission to a user “sandeep” using the ACL on the directory /user/sandeep. Lets create the directory “/user/sandeep” first.
# su - hdfs
$ hdfs dfs -mkdir /user/sandeep
Currently the user “sandeep” has no permission on the directory /user/sandeep as shown below.
$ hdfs dfs -ls /user
Found 3 items
drwxr-xr-x   - hdfs   supergroup          0 2018-08-31 19:41 /user/sandeep
1. Before we begin, lets view the current ACLs using the command “hdfs dfs -getfacl“.
$ hdfs dfs -getfacl /user/sandeep
# file: /user/sandeep
# owner: hdfs
# group: supergroup
user::rwx
group::r-x
other::r-x
As you can see, there are currently no ACLs set on the directory. and “hdfs” user and “supergroup” group are the sole owners of the file.
2. If you try to create a diretory in /user/sandeep or try to put any file. you would get an error as shown below.
# su - sandeep
$ hdfs dfs -put test_file /user/sandeep/test_file
put: Permission denied: user=sandeep, access=WRITE, inode="/user/sandeep":hdfs:supergroup:drwxr-xr-x
3. To allow user “sandeep” to have a read, write and execute access, we need to allow below ACL on the file.
# su - hdfs
$ hdfs dfs -setfacl -m user:sandeep:rwx /user/sandeep
4. To view the new ACLs, use the command shown below. The user sandeep now has a read, write and execute access to the directory /user/sandeep as shown in red color.
$ hdfs dfs -getfacl /user/sandeep
# file: /user/sandeep
# owner: hdfs
# group: supergroup
user::rwx
user:sandeep:rwx
group::r-x
mask::rwx
other::r-x
5. You can verify the ACL set by writing the file in the diretory /user/sandeep.
# su - sandeep
$ hdfs dfs -put test_file /user/sandeep/test_file
The “+” sign at the end of permissions of the file also verifies the ACL set on the directory.
$ hdfs dfs -ls /user
Found 3 items
drwxrwxr-x+  - hdfs   supergroup          0 2018-08-31 19:55 /user/sandeep
Removing ACLs from a file
To remove the ACL from a file/directory completely, use the -b option. For example:
$ hdfs dfs -setfacl -b /user/sandeep
Verify the ACLs again, to confirm removal:
$ hdfs dfs -getfacl /user/sandeep
# file: /user/sandeep
# owner: hdfs
# group: supergroup
user::rwx
group::r-x
other::r-x
You can also verify if the “
$ hdfs dfs -ls /user/sandeep
Found 1 items
-rw-r--r--   3 sandeep supergroup          0 2018-08-31 19:55 /user/sandeep/test_file